Review Media Assets
To access a media asset review session:
-
Select a review from the list and the Review Summary panel appears on the right-hand side of the screen.

-
At the bottom of the Review Summary panel, click the Review option.
-
You are taken to the Media Asset Review screen. Here you can start reviewing the asset that has been assigned to you.

While viewing this page you will see the review expiry date on the top toolbar. This is the date by which you must complete your review of the asset. This date will be present in the top-right corner of the page.

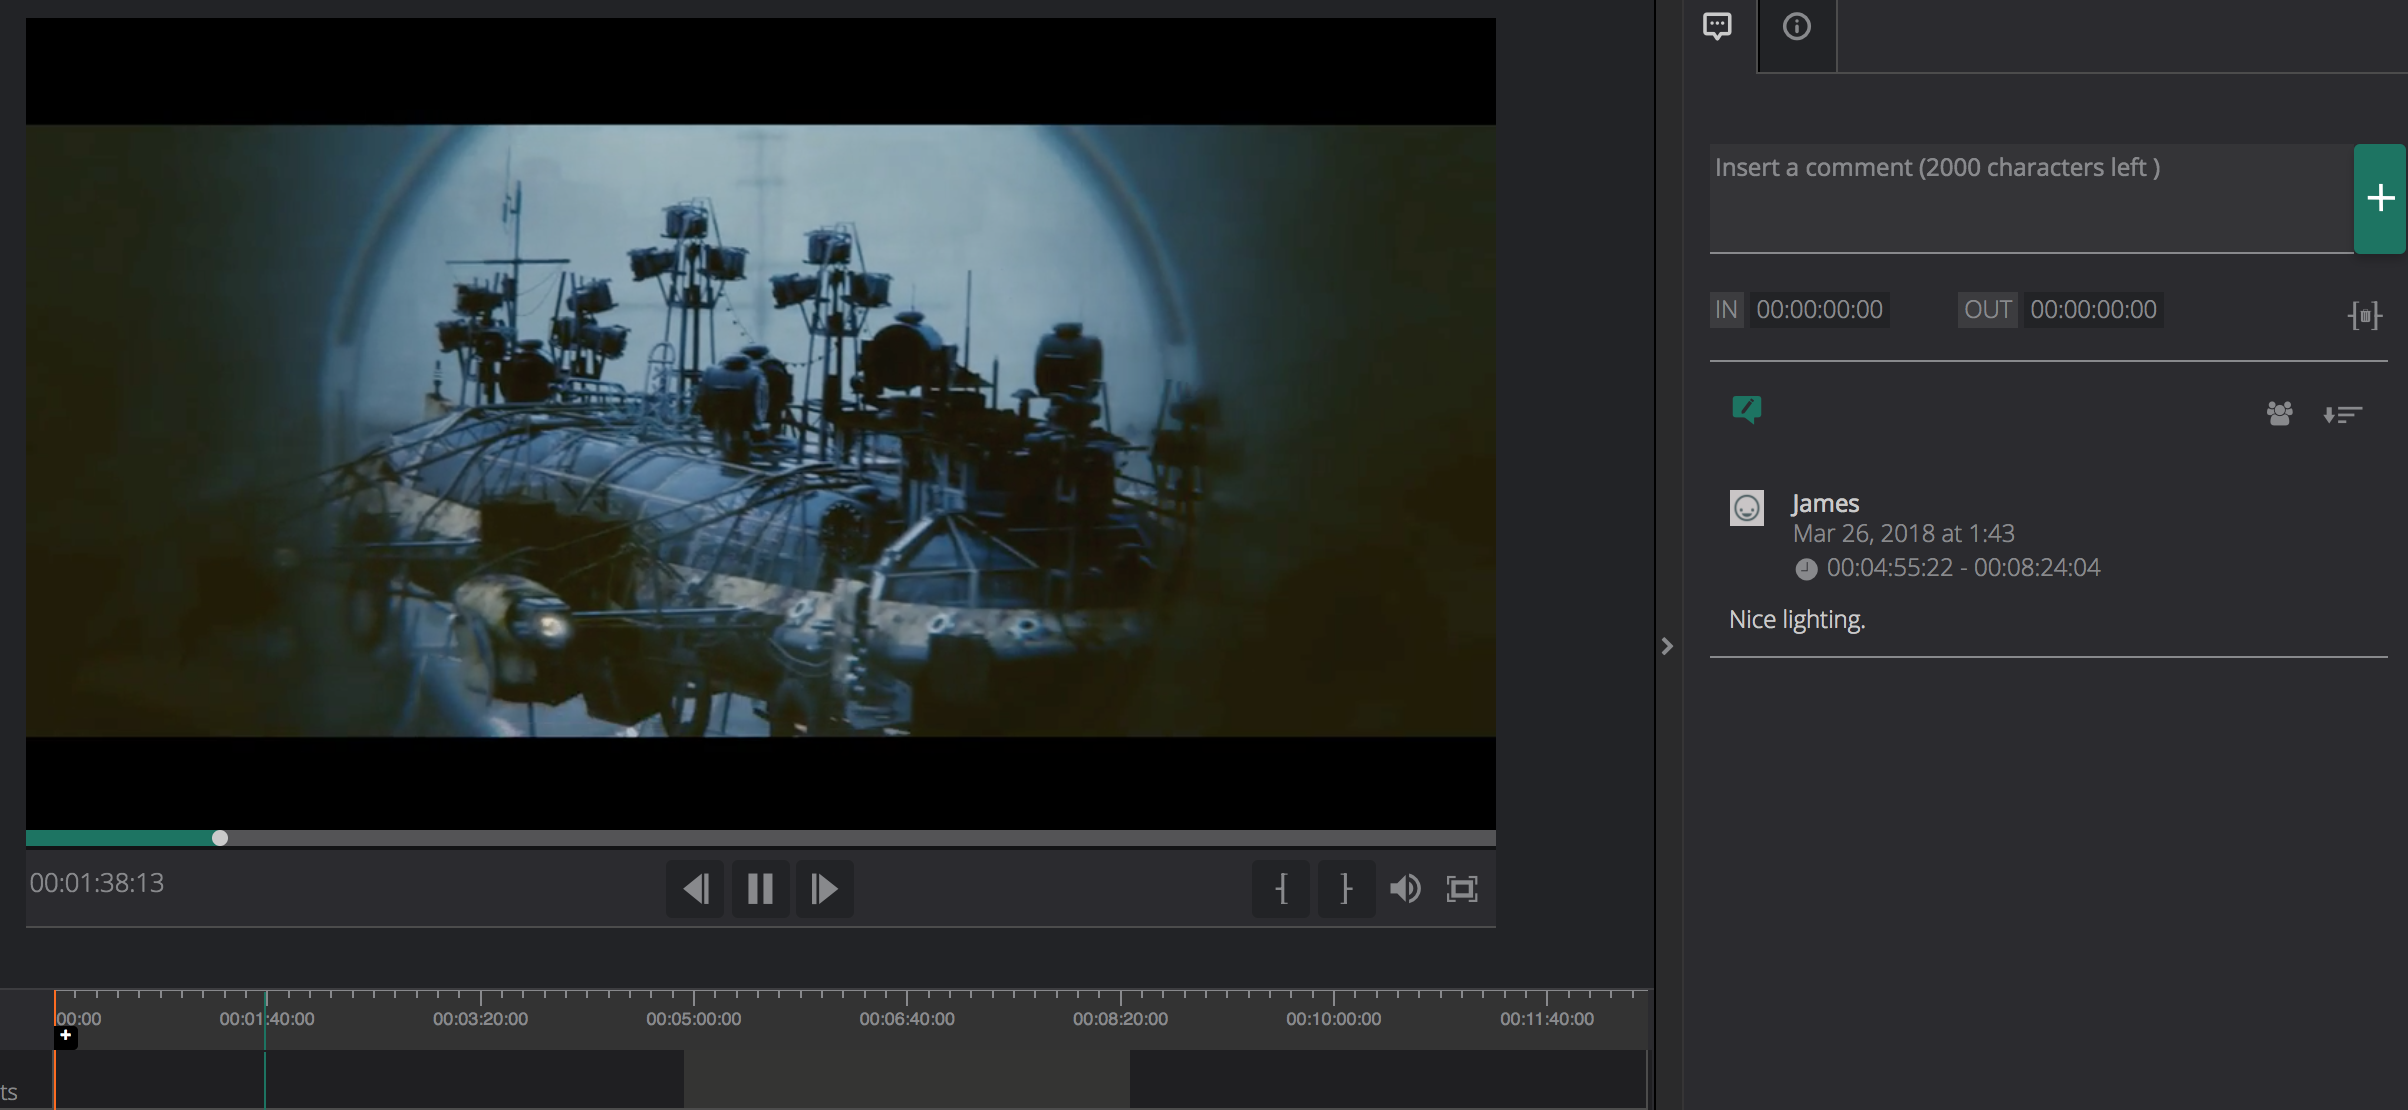
Media Asset Review Session Components
When you are in the Media Asset Review screen, you will see the following:
The player: This enables you to play and pause the asset.

Timeline: This shows you where comments have been posted against the asset.

By clicking on a comment in the Comments panel during a review session, the timeline will jump straight to where the comment was made.
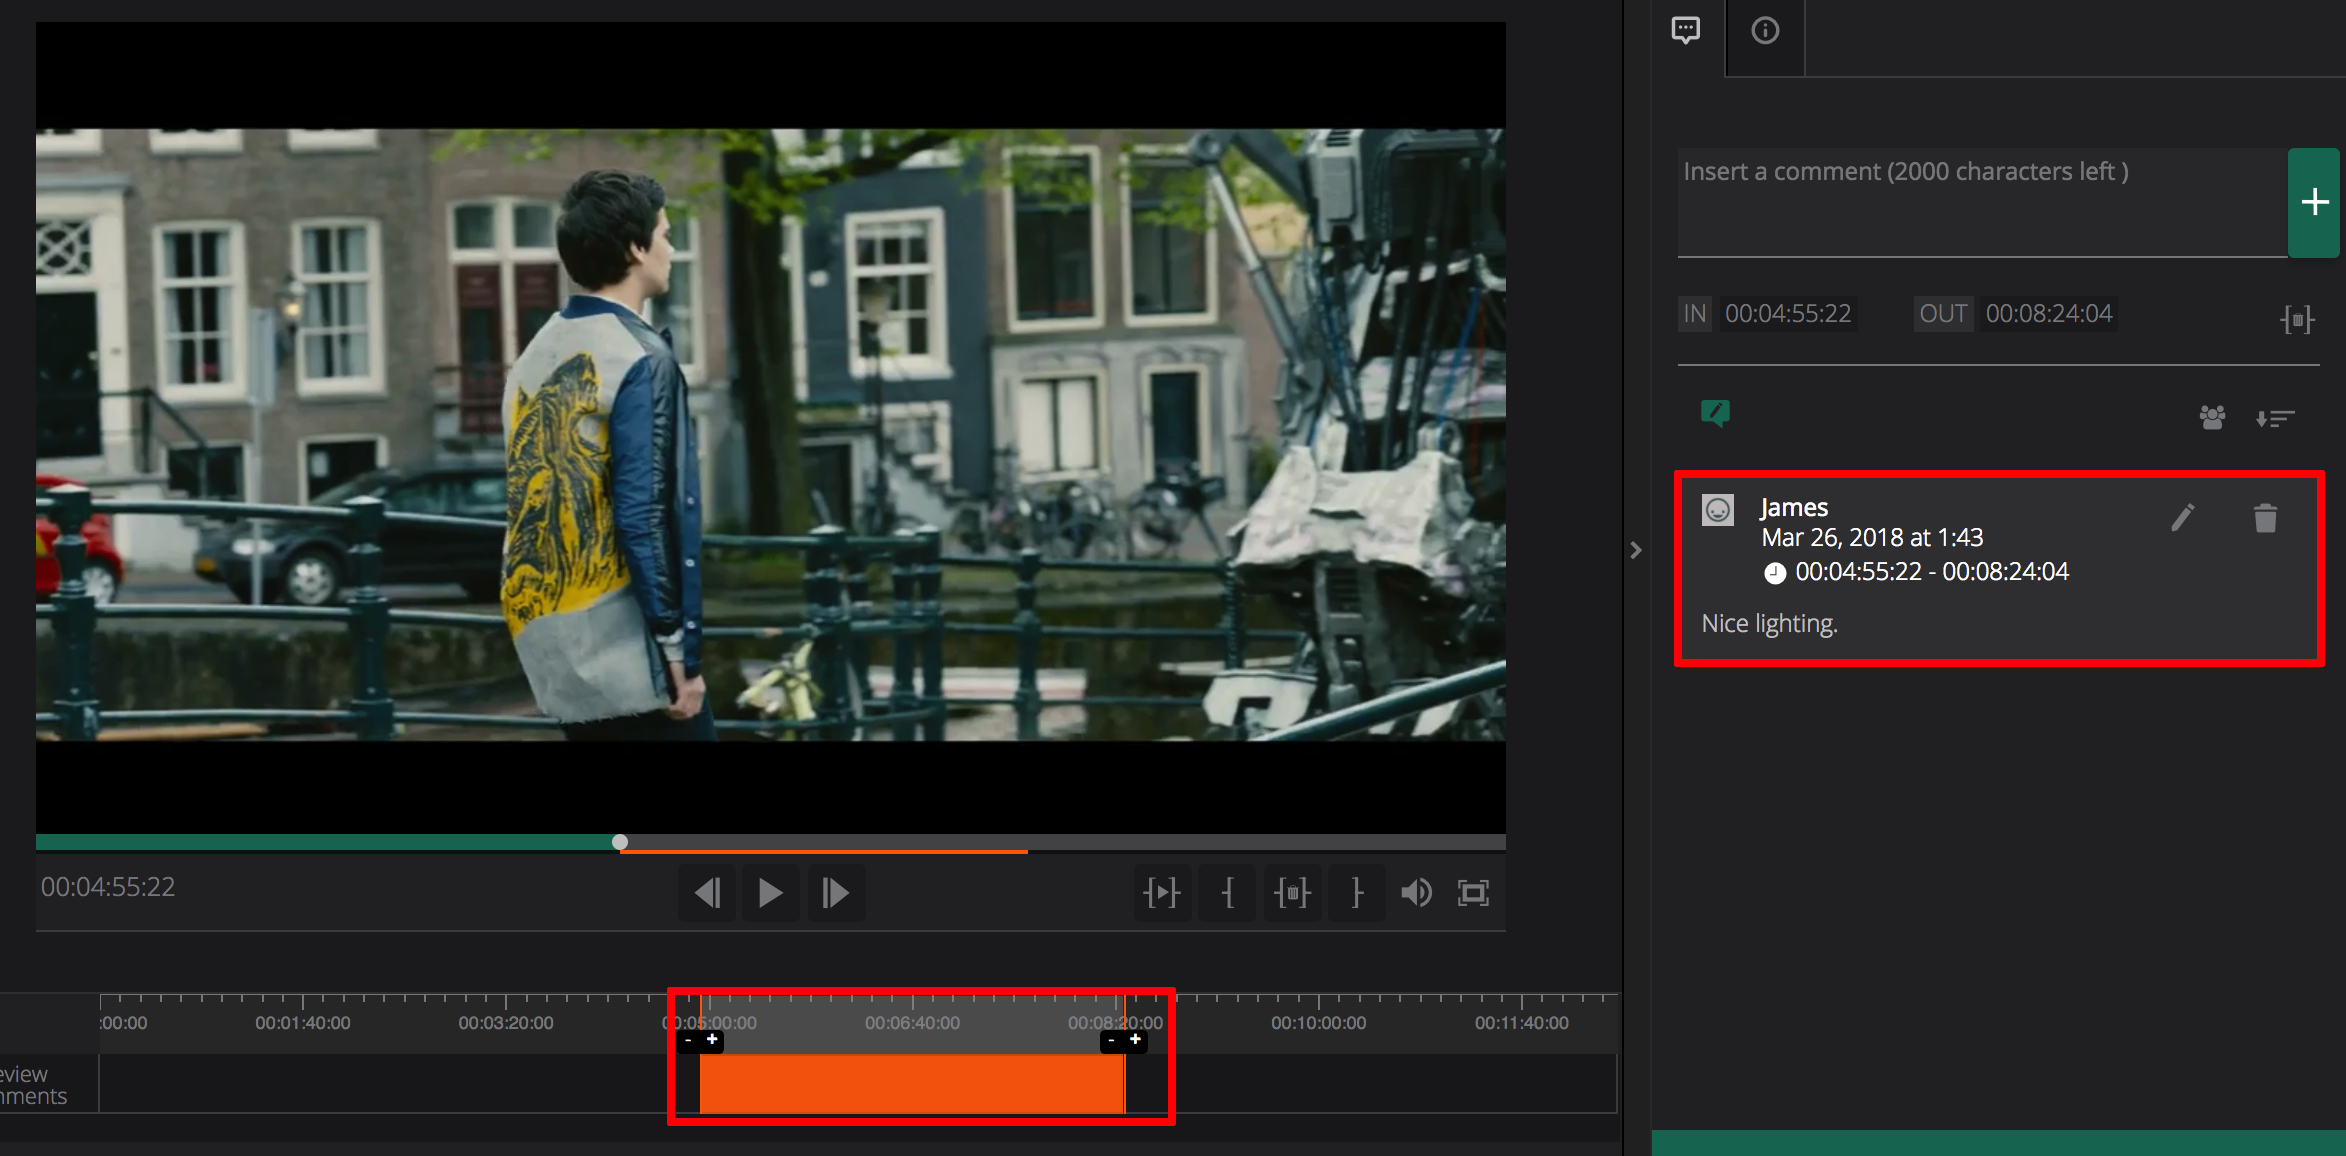
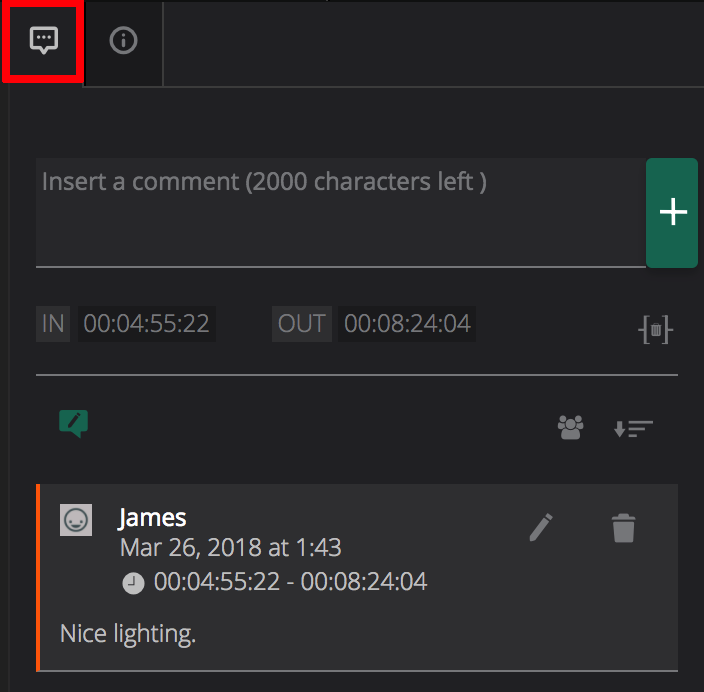
Comment tab: This enables you to post a comment against a particular frame or a series of frames in the asset.
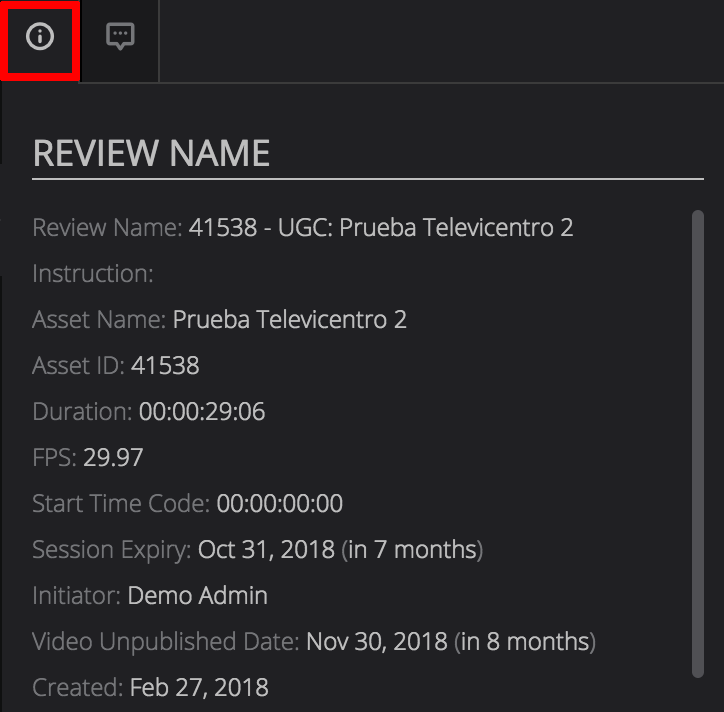
Information tab: This provides you with information about the asset, such as:
- Review name
- The relationship of the asset in terms of other assets
- The duration
- The frame rate per second
- Creation date
Finish: You will need to click the Finish option when you are done reviewing the asset. When you click this option, the Finish Review Session pop up appears. You can choose from the available options, then leave a final overall comment against the review session.

Review Session Player
As previously mentioned, the player enables you to play / pause the media asset that you are currently reviewing. The player also enables you to set in and out points so that you can post a comment against a specific frame, or series of frames.
When using the player, you will see the following components:
Timecode: The timecode shows you where you currently are while playing the asset.

Progress Bar: Displays the current position of the video playback respective to its duration. If you have marked the timeline with in and out points, this will be displayed against the progress bar.

Player Controls: The player controls enable you to play, pause, and skip frames.

In / Out: The In and Out options enable you to mark an in and out point so that you can comment against one or more frames in the asset.
![]()
Full Screen: This icon ![]() lets you view the asset in full screen view.
lets you view the asset in full screen view.
Volume Control: The volume control enables you to increase and decrease the volume.
Scrubber: You can scrub back and forth through the asset by dragging the toggle icon  left and right.
Keyboard Mapping for the Player
The player includes shortcut keys which you can use as an alternative to using the on-screen icons. These keyboard shortcuts are as follows:
| Key | Function |
|---|---|
| Spacebar | Toggle Play |
| Left Arrow | Previous Frame |
| Right Arrow | Next Frame |
| i | Mark an In point |
| o | Mark an Out point |
Review Session Timeline
The review session timeline gives you an overview of exactly where comments have been posted against an asset. If you click anywhere on the timeline, the player automatically jumps to that specific point in the video.

Any comments that have been posted against the asset will be represented by a coloured comment block on the timeline. For example: If you were to click anywhere inside one of these coloured blocks, you would be taken to that particular point in the asset that the comment has been made against.

You can also filter existing comments that have been made on the timeline, by the user who has made the comment. For example: you could filter it so that only comments made by one specific user are displayed on the timeline.
The Comment Panel
The Comment panel is located to the right of the player. By default the Comment panel displays comments ordered by Start timecode. So the comments read in a logical order to the asset. This can be changed using the filter. The order of the comments can be sorted by end timecode and timestamp of the comment if so desired.
In the Comment panel, you will see the following:
- User Profile Picture: This is the profile picture you have set for yourself in the main Dalet Flex console.
- User First and Last name: This is the first and last names that were assigned to you in the main Dalet Flex console.
- Timestamp of the comment: The timestamp shows you exactly when the comment was posted.
- The comment: The text of the comment itself will be displayed underneath the user profile picture and name.
- Sorting Filters: You will see a sorting icon, which when clicked, gives you the ability to filter comments by Start Time, End Time, Date, and User.

- Delete Icon: A Delete icon will be present next to all comments that you have made. You are not able to delete a comment that another user has made, and so, the Delete icon will not be present next to a comment that another user has made.
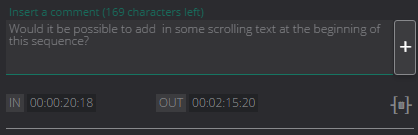
Posting a Comment
You can post a comment against a specific frame or a specific number of frames by specifying in and out points.
-
Start playing the asset.
-
When you reach the point in the video, that you wish to start commenting, click the Set In
 icon. The in point is then set, and is represented by a marker.

-
When you reach the point at which you no longer want to comment, click the Set Out
 icon. The out point is then set, and is represented by a marker. You can change the in and out points you have specified, by clicking and dragging the markers on the timeline.

-
Once the frames in between the in and out points have been specified, enter your comment in the Comment box.
You can reset the in and out points by clicking the Reset I/O icon. When you click this icon, both the in and out points will be set back to 00:00:00:00.
![]()
You can comment on the whole asset, by simply posting a comment without specifying an in and out point.
Downloading an Asset
As previously mentioned, you can specify whether or not a reviewer can download an asset and view it locally on their machine.
If this option has been specified by the user who created the review session, then you will be able to download the asset by clicking the Download icon.
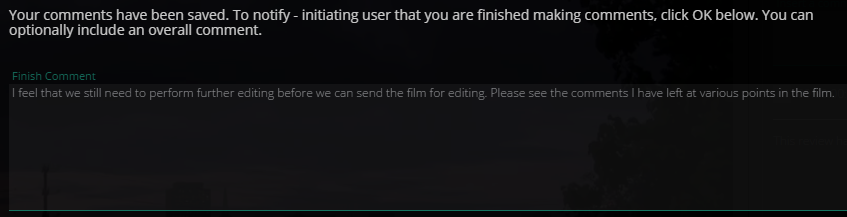
Completing a Review
In order to complete a review, click the Finish button located in the bottom-right of the Media Asset Review screen.
The Finish Review Session pop-up then appears.
This pop-up contains:
Finish Comment: Here you can write an overall final comment, which summarizes your review session. For example: you might write some information to explain why you are choosing a particular option to end the review.
The buttons displayed below this comment might vary from those shown above, which are as follows:
- Approve: This option enables you to approve the asset for progression.
- Reject: This option enables you to reject the asset.
- Query This option enables you to request more information about the asset.
- QC This option enables you to request that an error in the asset be fixed.