Adobe Premiere Panel
Adobe Premiere Panel is a microservice application designed to provide HTML pages into Adobe Premiere Pro Panel. It allows end user to import/Export assets from the Dalet Flex environment.
Before you start
In order to run Adobe Premiere Panel, you will need the following:
- Adobe Premiere Pro CC (2018 or higher)
- A preset created in Adobe Media Encoder (2018 or higher)
- The Dalet Flex Adobe Premiere Panel ZXP file (version 1.0.14)
Please contact your administrator for the required software and settings.
Flex Configuration
Setting up the panel in Adobe Premiere Pro includes the following fields which can be configured/found in the associated Ooyala Flex account:
- Metadata Definition ID
- Premiere Project Workflow Definition ID
- Raw Asset Workflow Definition ID
- Rendered Asset Workflow Definition ID
- Workspace ID (Optional)
Panel Setup & Login
Once you have successfully installed the Adobe Premiere Panel you can follow the steps below to set up the panel.
To open the panel:
- Launch Adobe Premiere Pro and create a new project.
- Go to Window > Extensions > Ooyala Flex.

To configure the panel:
-
The panel will prompt you to select or create a new environment.

-
Click the + icon to create a new environment
-
Fill in the following fields:
- Environment name: give your environment a name
- Panel Service URL: this is the URL for the server-side component of the panel. The Premiere plugin communicates with this service in the backend. This service needs to be installed inside the Flex environment. e.g., https://flex.demo.ooyala-flex.com/flexadobepanel/
- Click Load.
- In the Settings view, fill in and configure the following fields:
-
Environment name: this is the environment name as entered above
-
Flex Premiere Service URL: this is the panel service URL as entered above
-
Flex URL: this is the URL to the Flex environment the panel works with (it uses this to make API calls to Flex)
-
Shared Storage Path: This is where the Flex Panel will look for assets (media/image/text) to import into Premiere. The panel assumes that Flex and Premiere have access to this shared storage location.
-
Local Storage Path: this is where the Flex Panel will look for media assets on your local computer to import into Premiere. The panel assumes that Flex and Premiere have access to this shared storage location.
-
Export Path: this is where your rendered sequenced will be exported to on your local computer
-
EPR File Path: this is the Adobe Media Encoder preset which Premiere uses to render a sequence. This preset needs to be created in Adobe Media Encoder once before using it. See notes to learn how to do this.
-
Metadata Definition ID: this tells the Flex Panel which metadata definition to show in the Export screen of the Panel. The metadata entered will be sent into the Rendered Asset workflow.
-
Premiere Project Workflow Definition ID (Optional): this is the workflow that the Flex Panel launches to let Flex handle the Premiere project file itself. It is launched when you select Export > Update Flex or Export > Export in the Panel. This workflow is intended to take action/automation around the Premiere project file. If no workflow ID is entered here, then no workflow will be triggered and your project will be saved locally.
-
Raw Asset Workflow Definition ID: this is the workflow that the Flex Panel launches when it detects a new asset imported into Premiere not using the Flex Panel. It is launched when you select Export > Update Flex or Export > Export in the panel.
-
Rendered Asset Workflow Definition ID: this is the workflow that the Flex Panel launches you render your sequence, creating a new asset (using Adobe Media Encoder). This workflow runs when you select Export > Export.
-
Workspace ID (Optional): This is the ID of the Ooyala Flex workspace you are working in. If this field is left blank, all workflows will be triggered on the default workspace in Flex. If you enter a specific Workspace ID, then all workflows will be triggered in that workspace in Flex.
-
Raw Variant name (optional): This is where you can add comments to be displayed in workflow variables of the Raw Asset workflow in Flex. If you enter a value in the Raw Variant Name field, and Export or Update Flex from the Export screen to trigger the Raw Asset workflow, then the value entered will be displayed as a variant in the Variables tab of the workflow.
-
Rendered Variant name (optional): This is where you can add comments to be displayed in workflow variable of Render Asset workflow in Flex. If a value is entered in the Rendered Variant Name field, and the user clicks Export or Update Flex from the export screen and the Raw Asset workflow is triggered in Flex, then the value entered in the Rendered Variant Name field should be displayed as a variant in the Workflow Variables tab.
-
Export Selection: Select one of the following as your export setting:
- Entire Sequence: this is the default setting and will export the entire sequence
- Sequence In/Out: this will export the section of your sequence marked with In/Out
- Work Area: this will export section of the sequence in your Premiere Pro Work Area
-
Upload rendered asset to S3: You can select whether to upload your rendered asset to S3. Checking the box will prompt you to fill in your S3 Bucket credentials.

- Click Save Settings.
Using the Panel
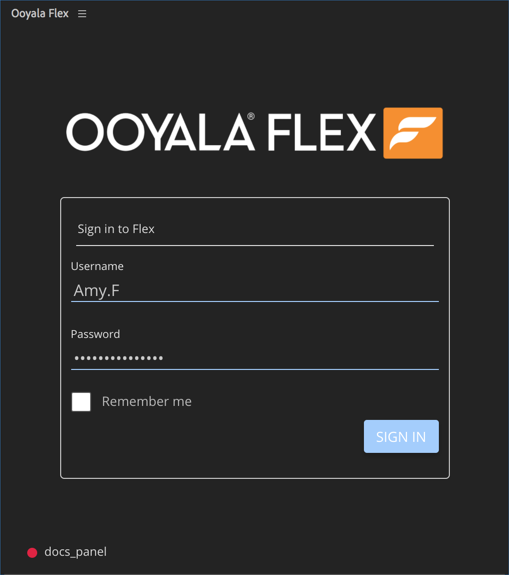
Logging In
Once you have configured your panel, you can select your environment and then log in with your Ooyala Flex credentials
Importing Assets and Collections
Once you log in, you will land on the Import page by default, which will load assets and collections from the Flex account it is associated with. With the Panel, you have a consistent view into the Flex asset library and can easily search across an up-to-date assets.

The search bar above the asset tiles allows you to search through assets imported and indexed by the Flex instance. You can enter an asset name or ID, or use FQL (Flex Query Language) to search for an asset or collection.
You can also add more assets to your project by opening your Shared Storage on the clickable path beneath the asset tiles.
Once you have found your desired assets or collections:
- Click on individual thumbnails to select them, or click the Select all button to select the assets you wish to import.
- Click the Import button.
- The assets or collections will be imported to the Premiere Library. They will be named according to the Flex asset name. Collections will be imported in their entirety (the entire hierarchy - collection, sub collections, assets) into your Premiere project.
You can now create and edit your sequence in Adobe Premiere Pro.
Note: If the imported asset has Flex Reviewer timeline comments, these will be visible in the Markers Panel in Premiere Pro.
Exporting Sequences
You can toggle to the Export page to view and enter metadata for the sequence you created in Premiere Pro, which you can then render and export. The metadata schema displayed will be will the that of the Metadata ID you entered at panel setup.
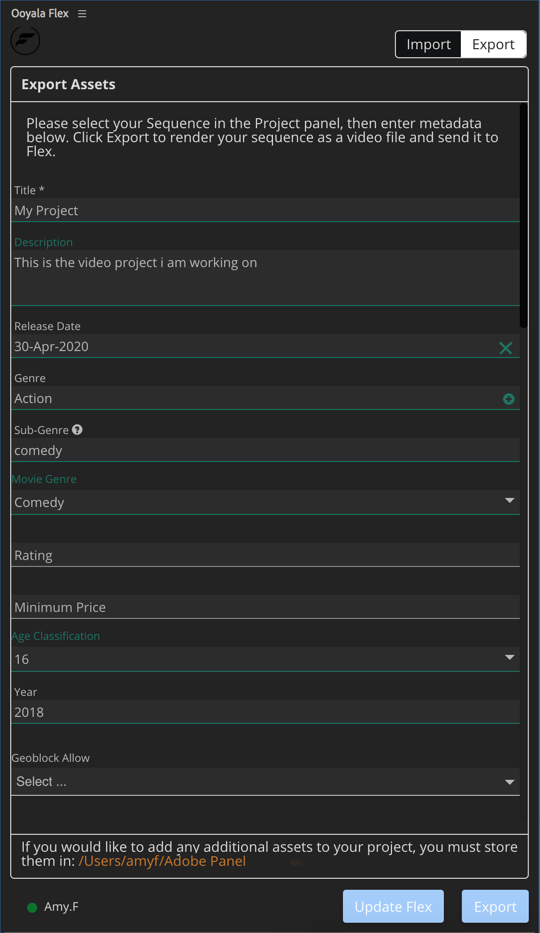
There are two buttons at the bottom of the Export page that you can select once you have entered your metadata:
- Update Flex
- Export
Syncing Premiere Project files
Clicking the Update Flex button will save your premiere project and checks that all your project assets are saved in the correct location. It also informs Flex about any new assets.
This function allows the use of Flex to synchronize the Premiere Project file among multiple editors in different locations, allowing them to work on the files without leaving Premiere. This is useful to avoid editors keeping local changes to the project file.
Additionally, Flex is used to keep track of any new media that was introduced by the editors locally. This media which did not originate from Flex’s central asset repository is ingested and becomes usable by everyone - it no longer just lives on the editor’s desktop.
Rendering a New Asset
Clicking the Export button will export the currently selected sequence, and send the rendered file to Flex. Clicking this will also save your current Premiere Project, and check that all your project assets are stored in the correct location. It also informs Flex of any new assets.
This action will
- runs all the steps that would run when you click Update Flex, as well as
- renders your current sequence using the EPR preset specified in the settings
- runs the Render Asset Workflow specified in the settings, passing in the metadata fields filled in the form as a variable to the workflow .
This allows editors to render sequences, apply relevant metadata, and export new assets back to Flex (and the shared infrastructure) without leaving Premiere. Metadata is captured so that assets stay organised. The editor does not have to choose the export profile or the export location - these are preset for them, avoiding human error and saving time.
Logging out
You can log out by clicking your username in the bottom left corner and clicking the Log out button.
Switching environments and modifying settings
You can update settings or switch environments by clicking your username in the bottom left corner and clicking the Settings button. From there you can do one of the following:
- Make any changes to your panel settings and click Save Settings.
- In the environments drop down menu, select the environment you wish to switch to. Click Continue when prompted.
Important Notes
Creating an AME preset
For your EPR file path, you need to create an AME preset. To do this, open Adobe Media Encoder, click Preset > Create Encoding Preset. No settings need to be edited, simply give it a name and click OK.