Event Handlers
When events are generated they are stored and they are added to a queue. You can create event handlers that consume and process specific event types and event properties. An event handler consists of a filter and a handler. The filter is a rule that matches against specific types of events. The handler responds to the filtered events and processes them in some way. The event handler system supports an API so that developers can create their own plugins to consume events and handle them in some way.
Event Handler Object Properties
| Property | Support | Explanation |
|---|---|---|
| Scope | Account | The scoping of this object |
| Visibility |  |
Whether the object supports visibility |
| Plugins | |
Supports plugins |
| Extended Config. | |
Whether the object has an extended configuration tab |
| Scripting | |
Whether the object can be configured using scripting |
| Enable / Disable | |
Whether the object can be enabled and disabled |
| Start / Stop | |
Whether the object can be started and stopped |
| Copy | |
Whether the object can be copied |
| Export / Import | |
Whether the object can be exported and imported |
| Delete | |
Whether the object can be deleted |
| Unique Name | |
Whether the object name must be unique within its scope |
| Variants |  |
Whether the object supports Variants |
Creating a New Event Handler
-
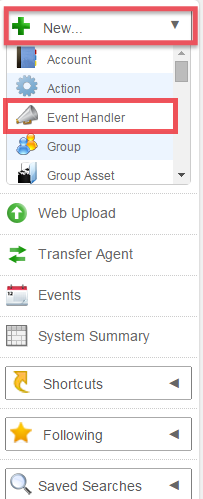
On the toolbar, click New and select Event Handler from the drop down menu.
-
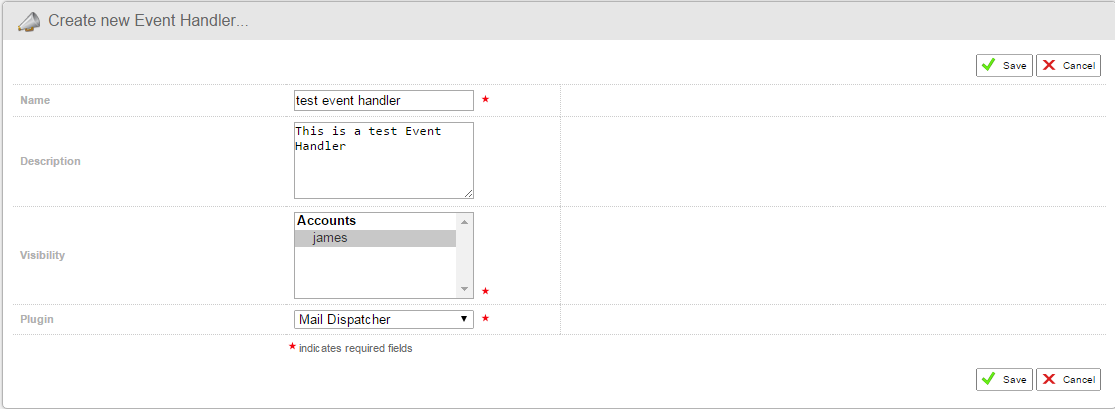
In the Create new Event Handler section, fill in the relevant details such as name, visibility, and plugin.
-
Click Save to finalise.
-
Once you’ve created your event handler, select the Configuration tab in order to see the values that can be set.
Event Handler Expression
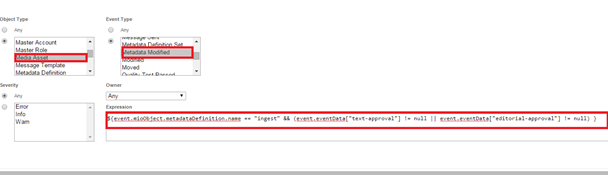
You can filter the event handler based on a rule of modifying a field of a metadata definition. This can be done using the following expression:
${event.eventData["<field name1>"] != null || event.eventData["<field name2>"] != null }
For example, if field name1 and field name2 are metadata definition fields:
${event.eventData["text-approval"] != null || event.eventData["editorial-approval"] != null }
Configuring a Filter
It’s important to make your filter rules as specific as possible. Otherwise you run the risk of generating a huge number of events that could clog up external systems.
Once you have created your new event handler you must set up a filter. A filter is a rule which defines which events should be matched and passed to your event handler for processing.
None of the fields discussed below are mandatory. However it is rare that an event handler would be set up to match and process all events created within Dalet Flex.
To set your filter rules
-
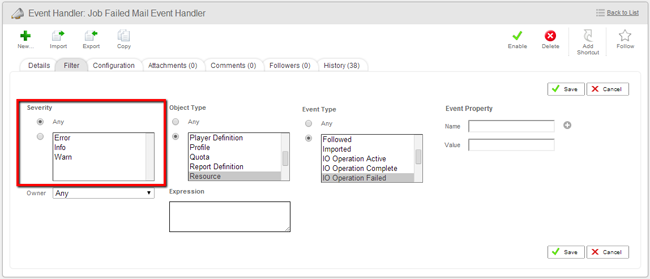
Go to the filter sub-tab.
-
Select Severity: The Severity field allows you to filter events by severity.
-
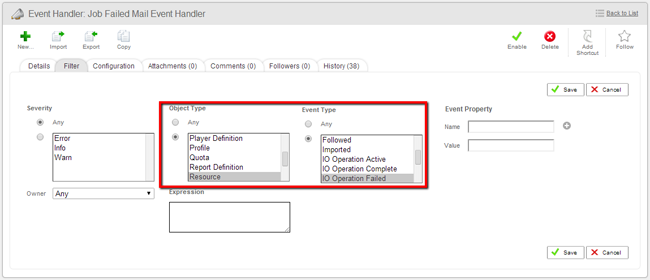
Select Event Type: Event types are filtered by the object type and then the event types supported by the chosen object type(s). First select the object types that interest you and then select the event types that are relevant to the object types you’ve selected. The event types shown are a collection of all event types associated with the object types you have selected.
-
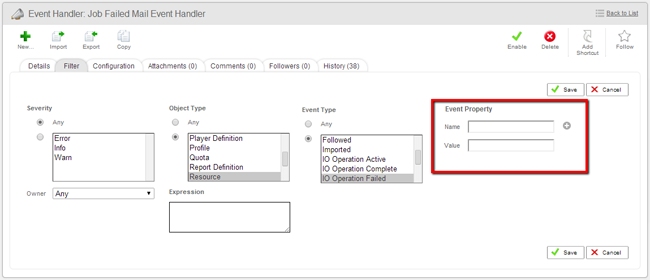
Select Event Properties: This field allows events to be filtered by their properties. Properties are name-value pairs that are associated with events. For example: Name: Username, Value: Jon.
-
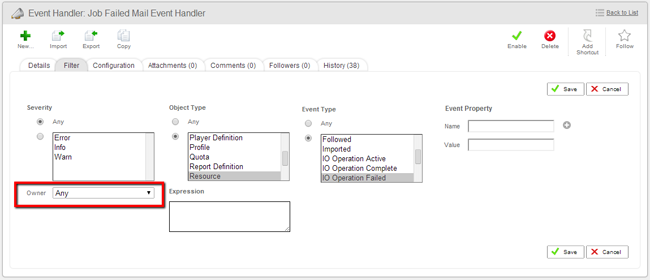
Select Owner: This field allows events to be filtered by the owner of the event. The owner is a specific Dalet Flex user.
-
Assign an Expression: This field allows for the entry of an expression for further refining your filter. An expression is assigned in the form of some script. For example:
${event.Ooyala FlexObject.type.name == "job"}.
Customising your Event Handler
To customize your event filter, follow these steps:
- Set the filter.
- Set the configuration.
You could create the following event handlers:
- Send email on failed or timed out job.
- Send email on failed resource.
- Create notification on update to a followed object.
- Create notification on comment added or attachment uploaded to an owned object.
- Create general notification on failed login.
- Send email for user account reminder.
- Send email on user added to group or workspace.
- Send email on user enabled.
- Send email on user password setting.
- Send email on quota soft limit.
- Send email on quota hard limit.
- Task assigned.
- For email type event handlers you should assign the appropriate templates.
Error Notifications
You will know if a job or resource has failed, as it will be presented on the relevant dashboard.
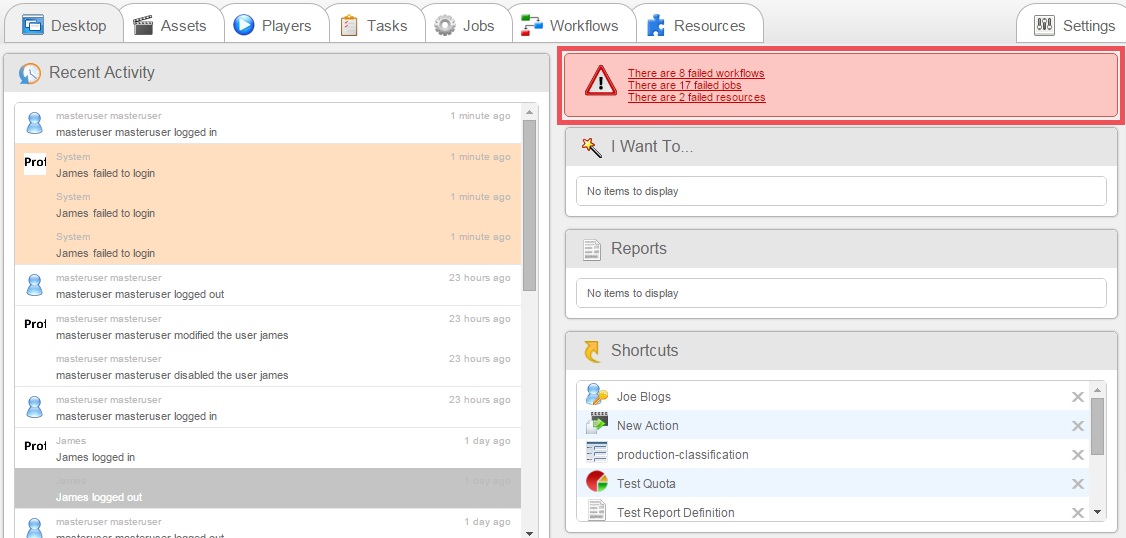
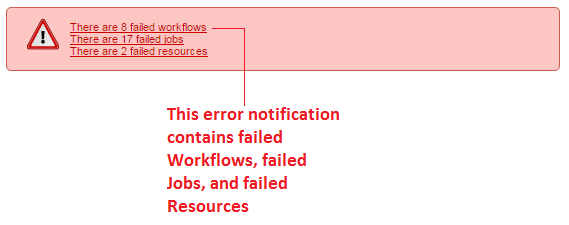
You can also set up event handlers to notify users and other systems of such failures.

Diagnosing Errors
There are two ways to diagnose errors:
Object History
-
Rollover Failure Event: If you roll over the failed job event entry in the history, an event pop-up will appear.
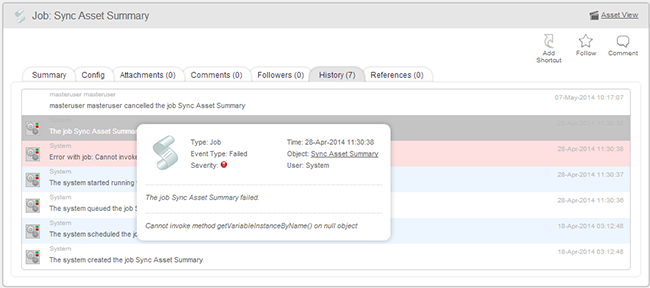
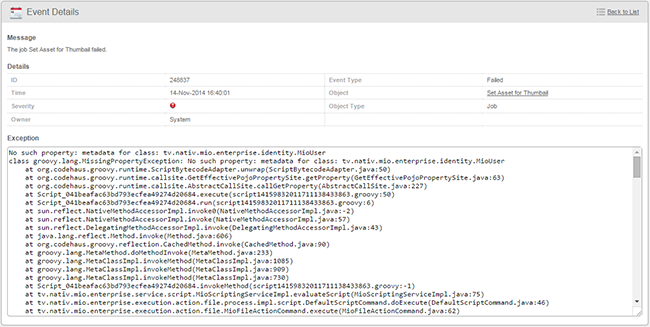
-
Click on the row Entry: You will be taken to an event screen with details.
Searching Events
-
Search for error events in the event search.
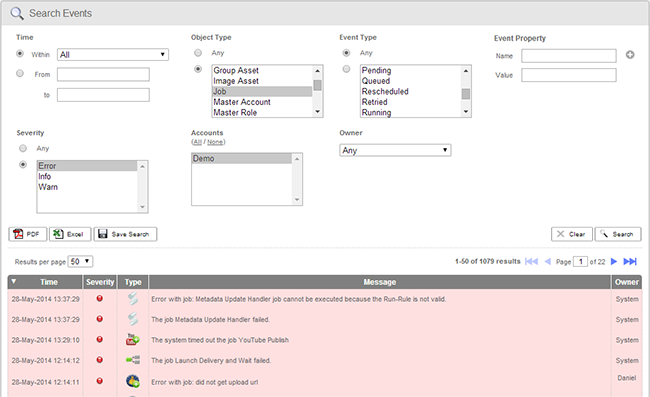
-
Click on the row Entry: You will be taken to an event screen with details.