Metadata Definition Configuration
Creating a New Metadata Definition
-
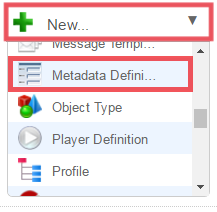
In the Dalet Flex console, on the toolbar, click New and select Metadata Definition.
-
The Metadata Designer launches in a pop-up window.
- In Name field, enter a name for your definition.
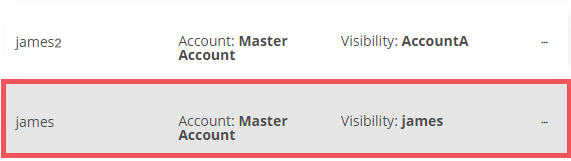
- In the Visibility field, select any accounts, sub-accounts, and groups that you want this definition to be visible in.
- In the Description field, enter an optional description.
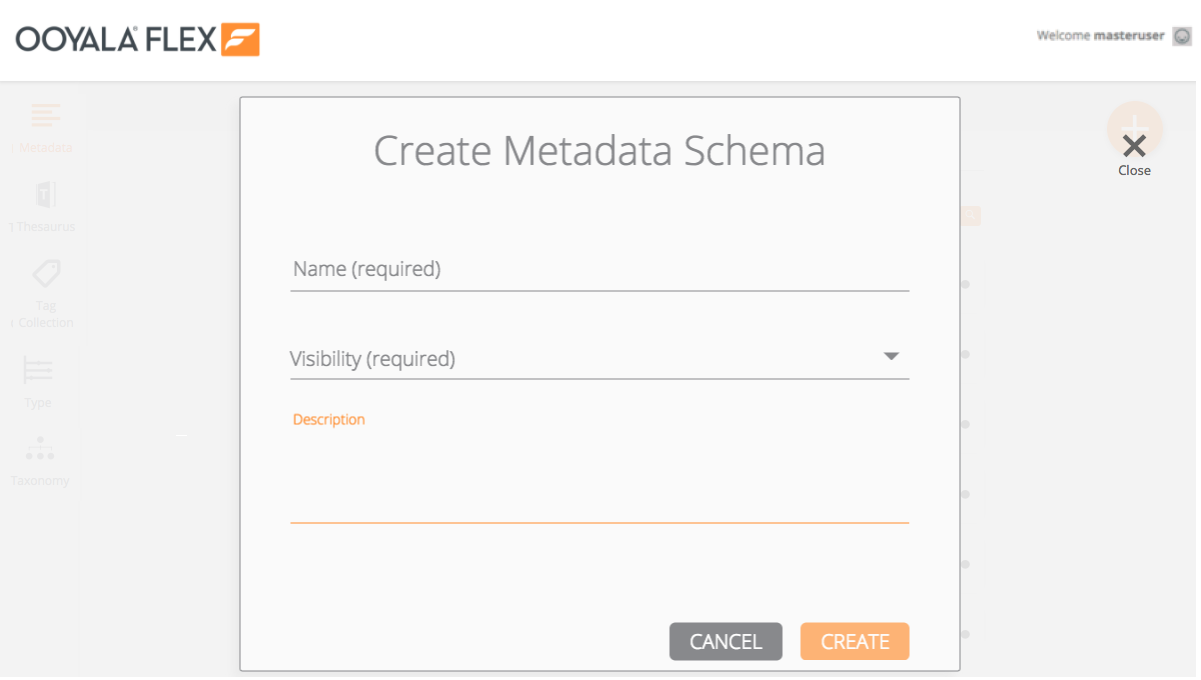
- Once you have created your metadata definition, you can add fields to it.
Editing an existing Metadata Definition
-
On the Metadata Designer landing page, click on an existing schema from the list.
-
In the bottom of the right-hand panel, click the Edit option.

-
The schema opens, and you can begin editing it.
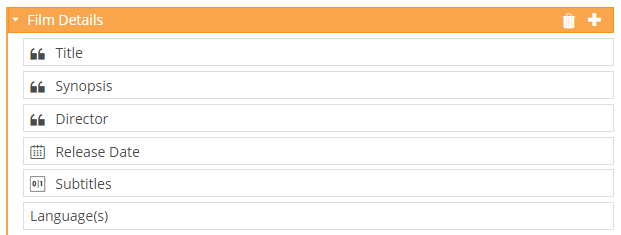
Adding and Removing Fields
Creating and updating a metadata definition involves adding items to, and removing items from, the Metadata canvas. Typically you add new fields from the Metadata panel and then configure them with the Metadata Configuration Panel.
To add a field to the Metadata canvas:
-
In the Metadata panel on the left-hand side, double-click on the field you wish to add, and it will be added to the bottom of the list of existing fields on the canvas.
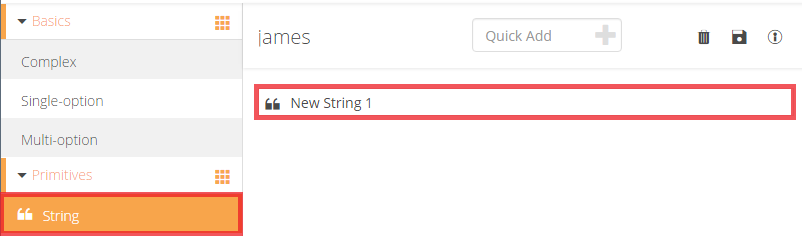
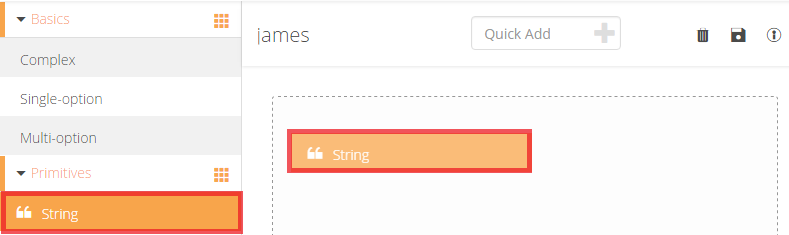
Alternately, you can click and drag the field from the Metadata panel, straight onto the canvas.
If you have more than one field on the canvas, you can move your new field into the correct position, by clicking and dragging the field. The other fields will then adjust accordingly.
-
Configure your new field by providing a name a description and any other options available, in the Configuration panel, located on the right-hand side of the designer.
If you wish to add more fields of the same type, you can keep clicking the field type in the Metadata panel and new fields will appear below the last one that was added.
You can also add a new field, directly in the canvas by clicking the + icon, on an existing field in the canvas. When you click the + icon, you will see a list of existing fields to choose from.
Using Quick Add
You can also add fields to your metadata schema, using the search field located at the top of the Metadata Designer.

To use the Quick Add bar
-
Start typing the name of the field you wish to add, and the option will appear in the typeahead.
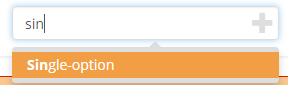
-
Select your desired field from the lookup, and it will appear in the search bar.

-
Click the + symbol, and the field will appear on the canvas.
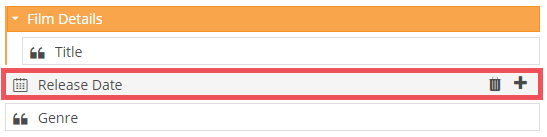
To add a new field via an existing field:
You can also add a new field to the canvas, by clicking the + icon located on an existing field, as shown below.

Removing fields
You can remove one or all the fields that are on the canvas.
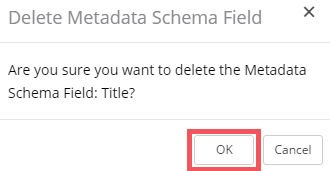
To remove a single field:
- Hover over the field you wish to delete.
- Click the Delete icon.

- In the Delete Metadata Schema pop-up, click OK to confirm.
To remove all fields:
- Click the Delete All Fields icon, located at the top-right of the page.

- In the Delete Metadata Schema Fields pop-up, click OK to confirm.
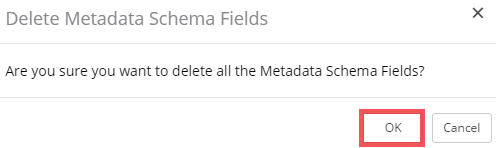
- The fields are deleted from the canvas.
Moving fields
Creating and updating a metadata definition involves adding fields to, and removing fields from, the canvas.
There are a number of ways to move fields on the canvas and change their position in relation to other fields. Before a field can be moved it must first be highlighted by clicking on it. Please note that at the current time, you can only move fields within the same container (Complex field). You cannot currently move them from one complex type to another.
To drag items around the canvas:
- Hold down your left mouse button over the field you wish to move.
- While holding down your left mouse button, drag the field up or down in relation to the other fields. The other fields will adjust accordingly. Release the left mouse button to stop dragging the item.

Field Configuration
If you click on a field in the canvas, the field configuration will be loaded into the Configuration panel.
The configuration options that you see in the Configuration panel depend on the metadata field that you have selected from the canvas.
In the following sections, we will describe the options available.
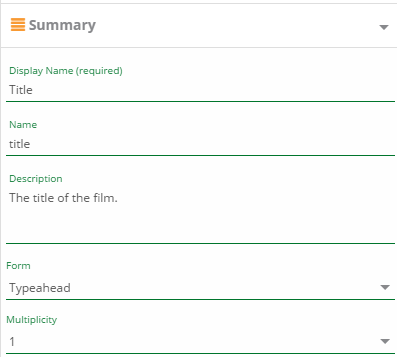
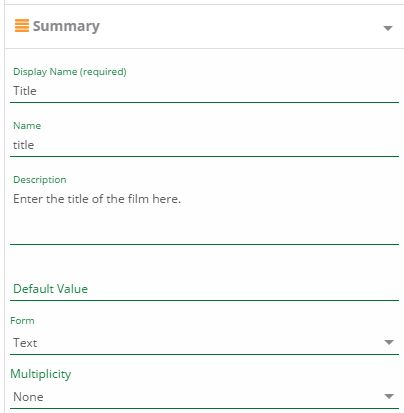
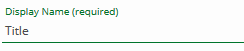
Display Name
The display name for the field.
Name
Name of the field.

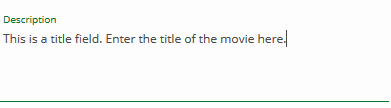
Description
Description of the field.
The instance of a description field will be represented by an icon. When you hover over this icon, the description will appear.
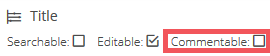
Editable
This section allows you to select whether the field is editable by other users.

Searchable
This section allows you to select whether the field is searchable by other users in search forms.

Commentable
This section allows you to select whether the field commentable.
Form Type
The form type applies to most field types. The form types available depend on the metadata field type.

Multiplicity Type
The multiplicity type applies to most field types and indicates how many instances of this field type can exist.

Validation Options
Validation Options allows the you to define how values entered into a field are validated. The following fields apply:
-
Validation: When this checkbox is selected it implies validation rules are applied. The following fields are also available.
-
Required: This is the most simple rule and simply states the validation applies and only fields with values entered will be accepted.
-
Description: This option allows the user to provide a description of the validation rule. This can be presented to a user when they are filling in the form field to ensure that they know what the validation rules are.
-
Max. Length: This is another simple rule that, if set, enforces a maximum text length for an entry type.
-
Script: This field allows the user to validate a rule against some script. Please see the API guide for more information on scripting.
-
The script field expects an expression script which is used to validate the value of the metadata field value. The following objects are accessible in the scripting context:
- value: The raw value associated with the variable instance.
- variable: The variable object.
- variableInstance: The variable instance object.
-
-
Class Name: This is an advanced field that allows a developer to specify a class name to be used for the purposes of validating a field entry. Please consult the API guide for more information on class name validation.
-
Option Values: This option type allows for the specification of option values for single-option and multi-option field types.
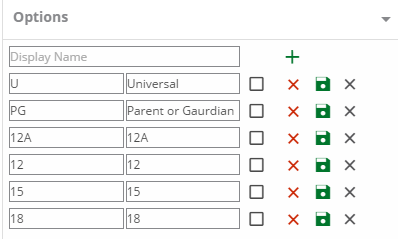
The options panel offers a range of editing features as listed below:
-
Adding a new Option Value: To add a new Option value, enter the value in the Display Name box and press the green cross button.

-
Select the default Value: For Multi-option field types you can select more than one default value. For a single-option type you can select only one.

-
Deleting an Option Value with a button: Click the Delete icon to remove a row.

-
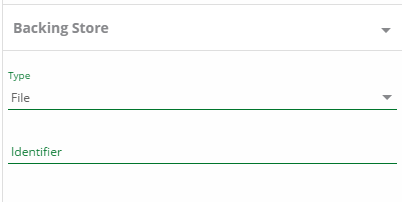
Backing Store Values: If you select an option type field, then if you select the Backing Store field, the Option Values panel (shown above) is hidden and the Backing Store panel appears. You can select the backing store Type and Identifier value.
-
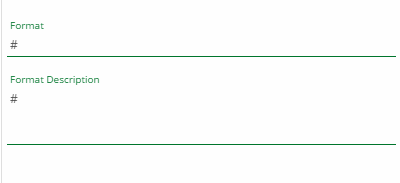
Formatting Options: Formatting rules allow you to control how Number, Date and Time fields are presented to users. The options above are described below:
- Checkbox: Check this box if you wish to support formatting
- Formatting: For Number, Date and Time field Types, formatting can be provided to control how a number is presented to users.
- Format Description: An optional field that allows for a user to provide descriptive information about the format rules specified.
-
Unit Options: Unit Options apply to numeric field types and allow you to specify units for a chosen number field.

-
Object Types: If you create a field of type object, you will be asked to choose your object type from a drop down list of Dalet Flex object types.

-
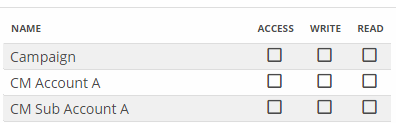
Permission Options: Dalet Flex’s metadata framework supports per-field access control. This means that Users can specify which user groups can view and edit a particular field in a schema instance. If you select the Permissions checkbox, then the Permissions panel becomes visible. If you enable permissions, then no access is available until you apply access to individual groups. To do this, click on Access and then select read or read and write. The options available are as follows:
- Checkbox: Check this box if you wish to support permissions
- Access: This means that the selected user group has access to the field
- Read: This means that the selected user group has read access to the field (cannot edit)
- Edit: This means that the selected user group has edit access to the field