Proxies
Setting Up a Proxy
A proxy enables you to play your media assets and view your image assets in both the Core / MAM / Reviewer UIs. You can adjust your existing import workflow so that it automatically creates proxies for both image and media assets.
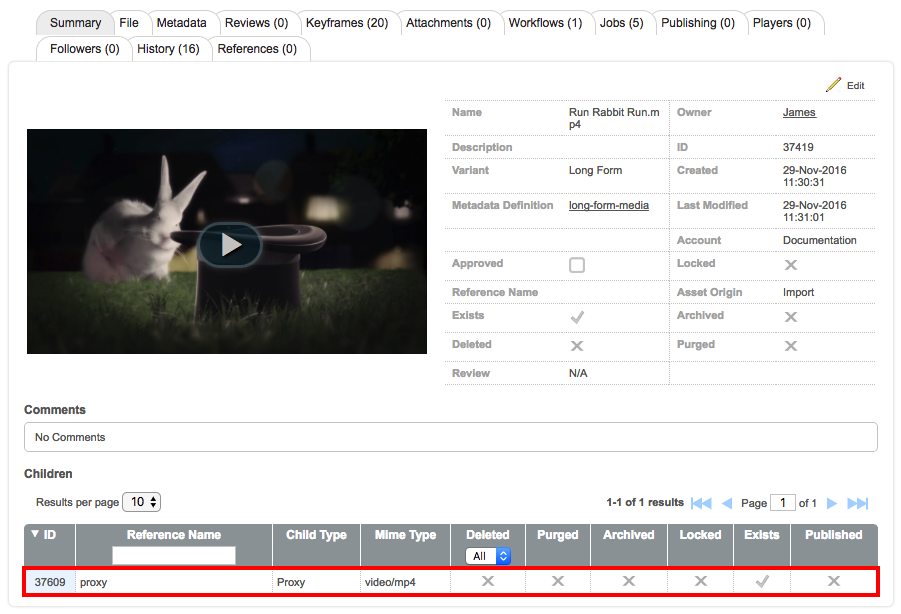
When you upload, the proxy it is treated as a child of that asset. This is shown below in the Core UI:
There are two methods in which to set up a proxy for your image assets.
Method 1: Creating an Import Workflow with an Inbox for Image Assets
To create an import workflow with an inbox specifically for images assets, consult the A Basic Import Workflow guide. This includes creating a proxy for your images assets.
Method 2: Updating Your Current Import Workflow
To set up a proxy for an image asset, you will need to do the following:
- Create and configure a transcode resource.
- Create and configure a transcode profile.
- Create a proxy action.
- Create a decision action so that your workflow can create proxies for both media and image assets in the same workflow.
- Adjust your existing import workflow so that it contains the create image proxy, and decision node.
Create a Transcode Resource
To create a transcode resource, follow these steps:
-
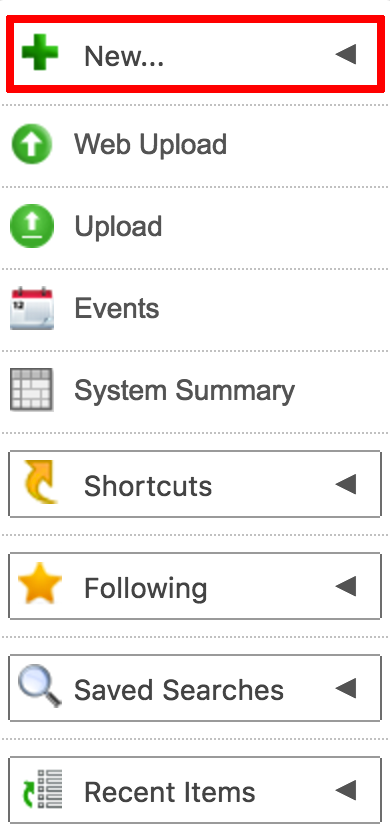
On the toolbar, click the New option.
-
From the drop down, select Resource.

-
In the Create new Resource… screen, you will need to enter the details for your transcode resource.

-
In the Name field, enter a name.

-
In the Description field, enter an optional description.

-
From the Visibility field, select the workspaces, accounts, and groups that will have access to this transcode resource.

-
From the Plugin field, select Transcode Resource.

-
From the Polling Interval field, select a polling interval, for example 1 minute.

-
Click Save.
-
Next, click the Configuration sub-tab.

-
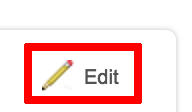
Click the Edit option.
-
In the Transcode Engine field, select Flex Stream Processor.

-
In the Transcode Host Names field, specify a hostname.

-
In the Transcode Management Host field, specify the host name.

-
In the Transcoder Management Port field, enter the following port: 18110.

-
In the Transcode Platform field, select Unix.

-
In the Path field, specify a path.

-
Click Save.

-
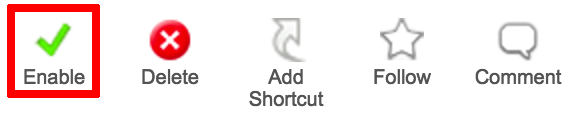
Click Enable.
-
Click Start.

Create a Transcode Profile
To create a transcode profile, follow these steps:
-
On the toolbar, click the New option.

-
From the drop down, select Profile.

-
In the Create new Profile… screen, you will need to enter the details for your transcode profile.
-
In the Name field, enter a name.

-
In the Description field, enter an optional description.

-
In the Visibility field, select the workspaces, accounts, and groups that will have access to this transcode profile.

-
From the Type field, select Media Transcode.

If you are creating an image proxy, you must select Image Transcode, otherwise the transcode will not work.
![]()
-
Click Save.

-
Click Enable.

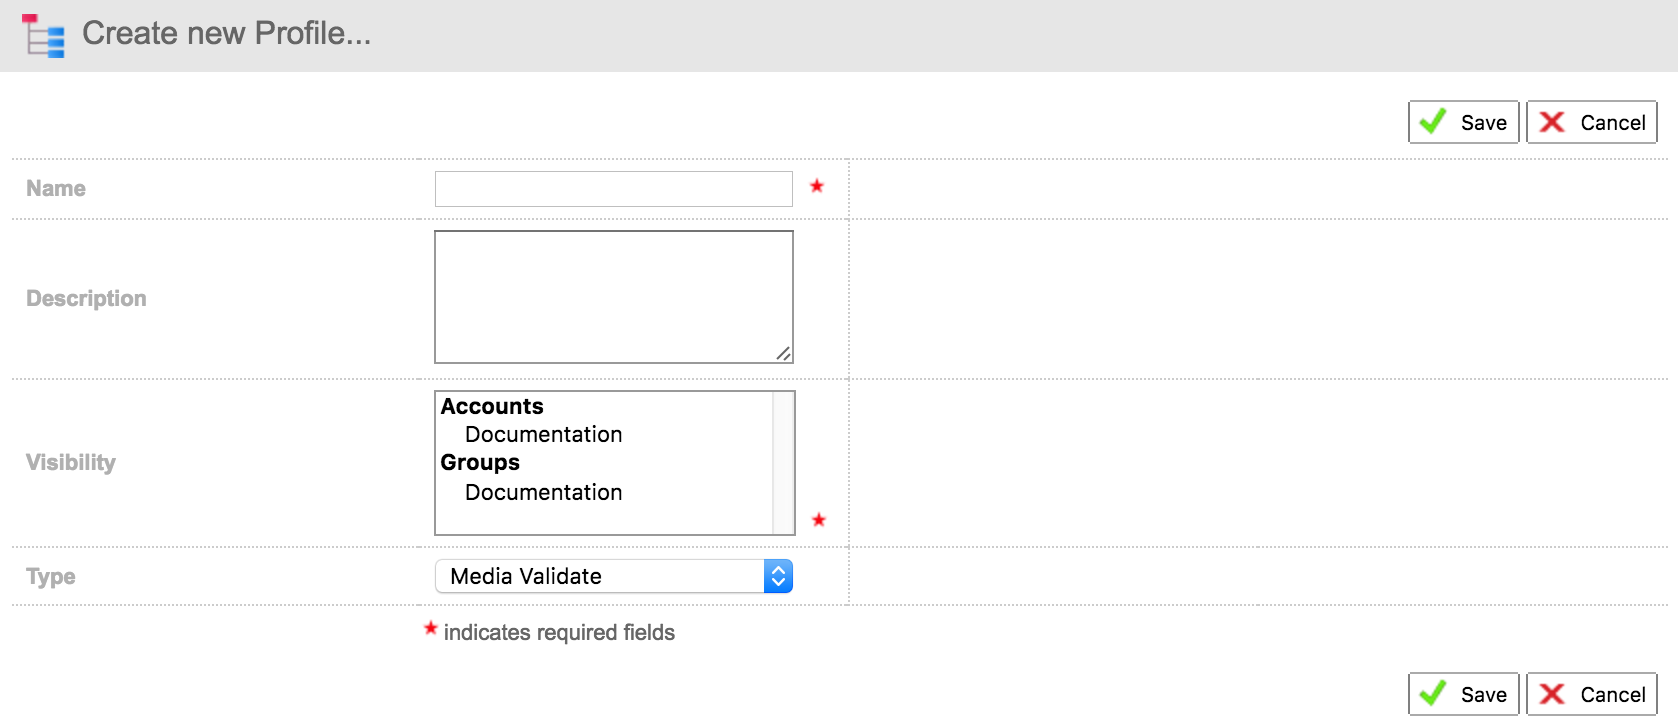
Create a Proxy Action
To create a proxy action, follow these steps:
-
On the toolbar, click the New option.
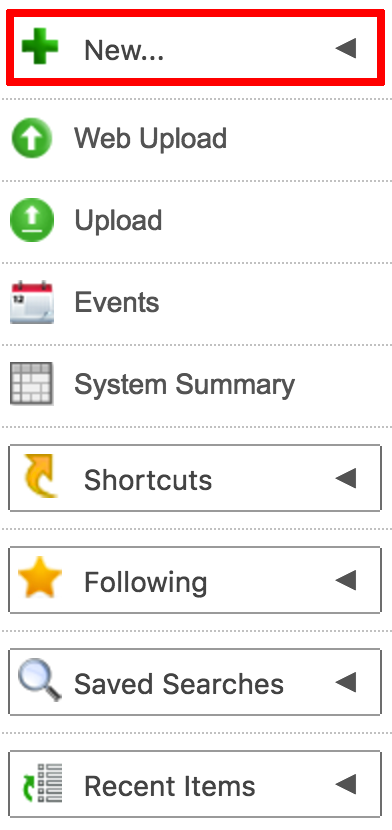
-
From the drop down, select Action.
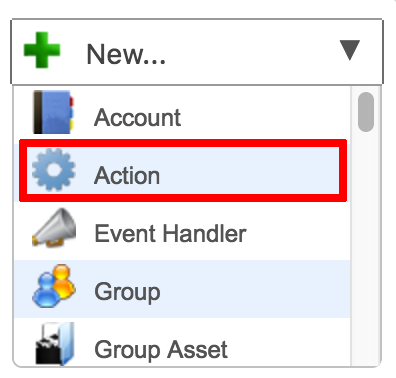
-
In the Create new Action… screen, you will need to enter the details for your proxy action.
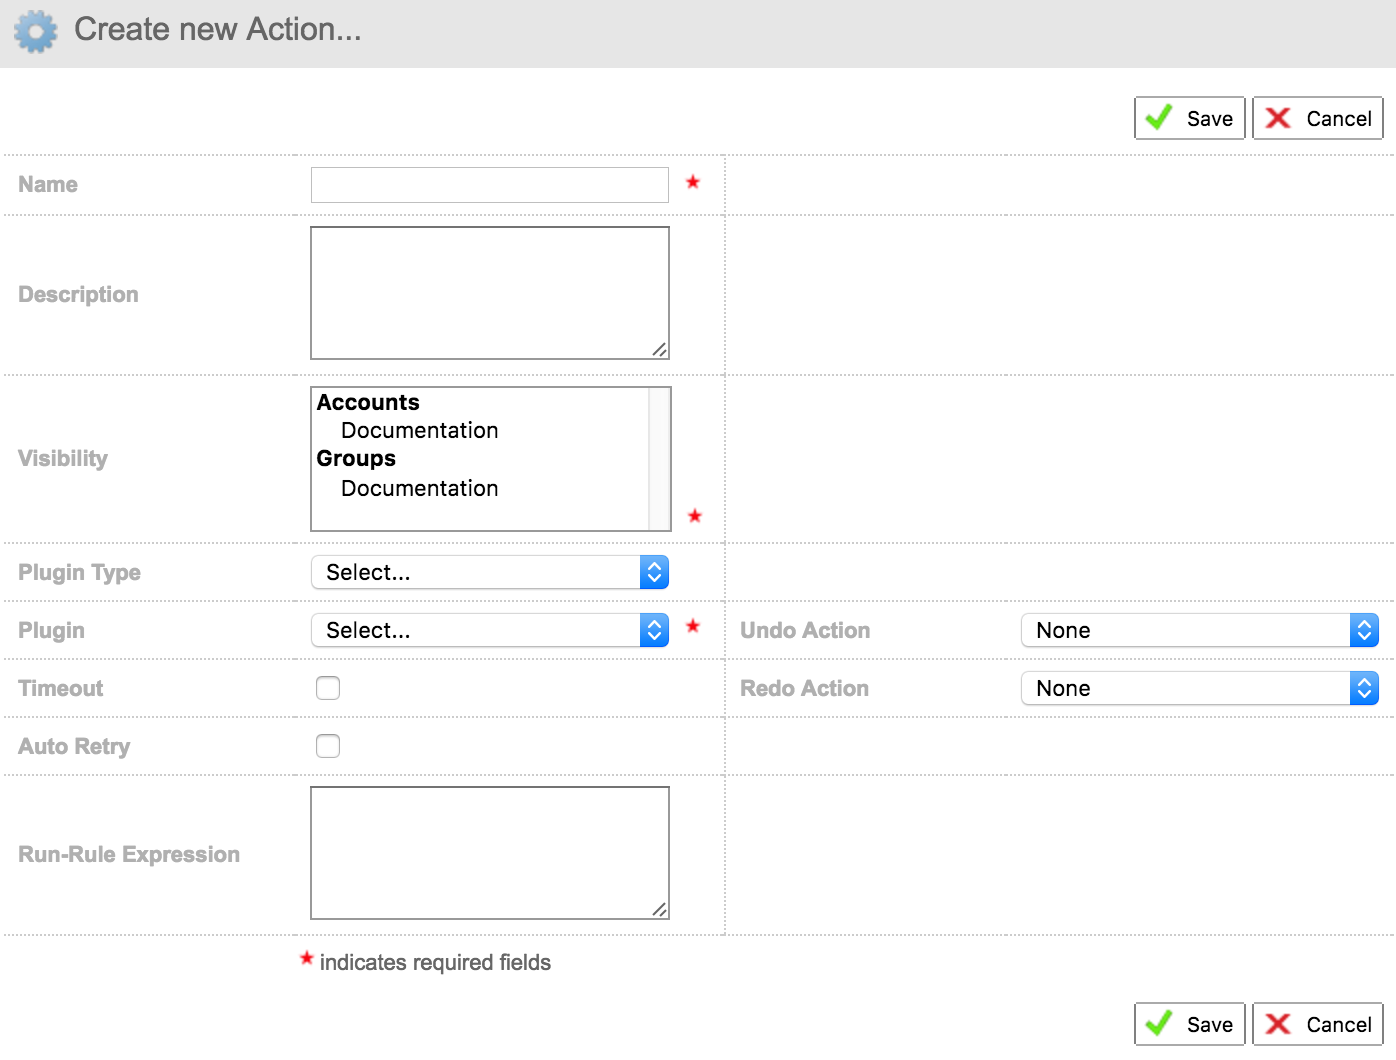
-
In the Name field, enter a name.

-
In the Description field, enter an optional description.

-
From the Visibility field, select the workspaces, accounts, and groups that will have access to this proxy action.

-
From the Plugin Type field, select Create Proxy.

-
From the Plugin field, select Create Proxy Action.

-
Click Save.

-
Next, click the Configuration sub-tab.

-
Click Edit.
-
From the Transcode Profile field, select the transcode profile that you have just created.

-
From the Folder Resource field, select a destination that is pointing to a storage.

-
Click Save.

-
Click Enable.

Updating Your Import Workflow
If you have an existing media asset import workflow set up, you will need to adjust it, so that it creates a proxy for both image assets and media assets. You can do this by creating a groovy scripted decision action. The groovy scripted decision action uses a script that can determine whether the asset you have imported is either an image asset or a media asset and then create a proxy.
Creating a Groovy Scripted Decison Action
To create a groovy scripted decision action, follow these steps:
-
In the Ooyala Flex console, on the toolbar, click New.
-
From the drop down, select Action.
-
Give your action a name and optional description.
-
In the Visibility field, select which accounts, workspaces, and groups in which you want the action to appear.
-
In the Plugin Type field, select Decision.
-
In the Plugin field, select Groovy Scripted Decision Action.
-
Click Save.
-
Click the Configuration tab.
-
Click Edit.
-
Expand the Script field, by clicking the + symbol.
-
In the text box, enter the following script:
def execute(){ Long resourceId = context.getMioObjectVariable("resource").id String name = context.getStringVariable("resourceItemName") ResourceService resourceService = services.getResourceService() if (resourceService.capacityItemSupportsImageType(resourceId,name)){ return true } return false } -
Click Save.
-
Click Enable.
-
Navigate to your existing workflow.
-
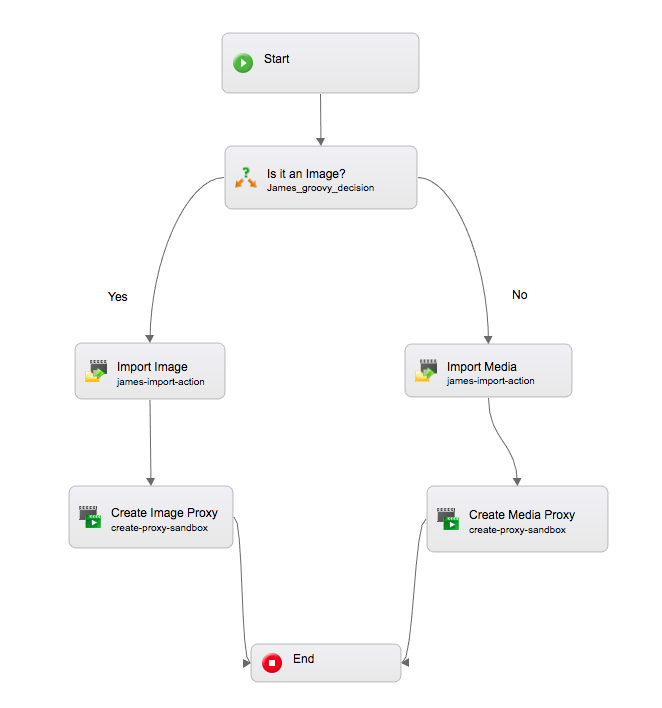
Update your existing import workflow, so that it contains:
- A decision action
- An additional import node so that images can be imported
- A create image proxy.
The workflow will look like this:
Proxy Settings
To make full use of the rough-cut tool. An Elemental Server license will be required with the following settings.
Recommended proxy details:
Video
- Codec: H264
- Profile: Baseline
- Level: 3.1
- Pixel Format: YUV420
- Bit Rate: 1600Kbps
- Size: 1024x576
- Aspect Ratio: 16:9
- Frame Rate: Same as source
- GOP size: 50 (no scene detection, closed GOPs and 1 ref frame)
Audio
- Codec: AAC-LC
- Channels: 2
- Bit-rate: 132Kbps
- Sample Rate: 44100
- Format
- MP4 with fast streaming (MOOV at start of file).
Recommended Proxy details
If the proxy is stored in S3 make sure the cors headers, create a cors configuration from the AWS console:
resource "aws_s3_bucket" "Name" { bucket = "Bucket_Name" acl = "private" cors_rule { allowed_headers = ["Authorization"] allowed_methods = ["GET"] allowed_origins = ["*"] //expose_headers = ["ETag"] max_age_seconds = 3000 } }