Dalet Flex documentation has moved!
This page is no longer actively maintained. For the latest documentation, please visit us at our new support portal: https://support.dalet.com
Install and Setup
In order to start using FlexCM, there are a number of steps that you must carry out. Firstly, you will receive the FlexCM package via your preferred method of delivery. This package will contain the FlexCM .jar file.
Running FlexCM
- Copy the .jar file into your local home directory. E.g.: In Windows:
C:\Users\<<Username>> - Next, open the command console, and from the directory where you have placed the .jar file, run the following command:
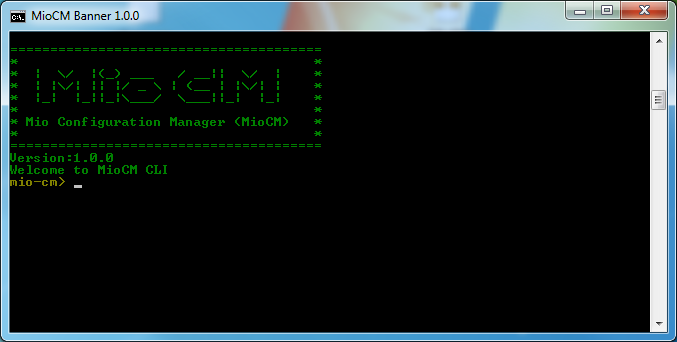
java -jar flexcm-tools-cm-2.0.0.jar - When you have done this, you will see the following welcome message:
Setting up a Repository
- Run the following command:
repository --defaultPath <absolute_dir> --defaultRepository <name_of_repository>. This will create the folder and produce amiocm-config.ymlfile in~/miocm-config.yml(this is the home directory). - When the repository has been created, you will see a confirmation message which reads Repository created, as shown in the example below:

FlexCM will store Dalet Flex environment configurations, change sets, and logs in your repository.
Creating an Environment Structure Inside the Repository
Next, you will need to set up an environment structure inside your repository. This means you will need to specify a source environment and a target environment.
- Run the following command:
environment --envname <name_of_environment> --endpoint <endpoint> --username <username> --password <password> - If the command has been run successfully, you should see the following response:
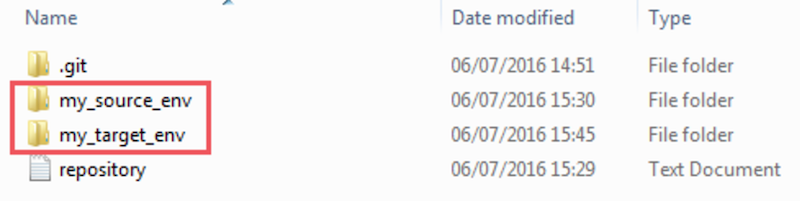
Environment created: Environment (name=my_source_env, uuid=12dafb34-5678-9123-4d5c-be6ef7ab89b1, dirName=C:\my_new_repo, endpoint=my_dalet_flex_environment.com, username=mypassword, password=myusername, hostHeaderParam=null, isReady=true) - Now, a folder will be created in your repository for each environment you have specified. In the example below, you can see a folder for a source environment, and one for a target environment.
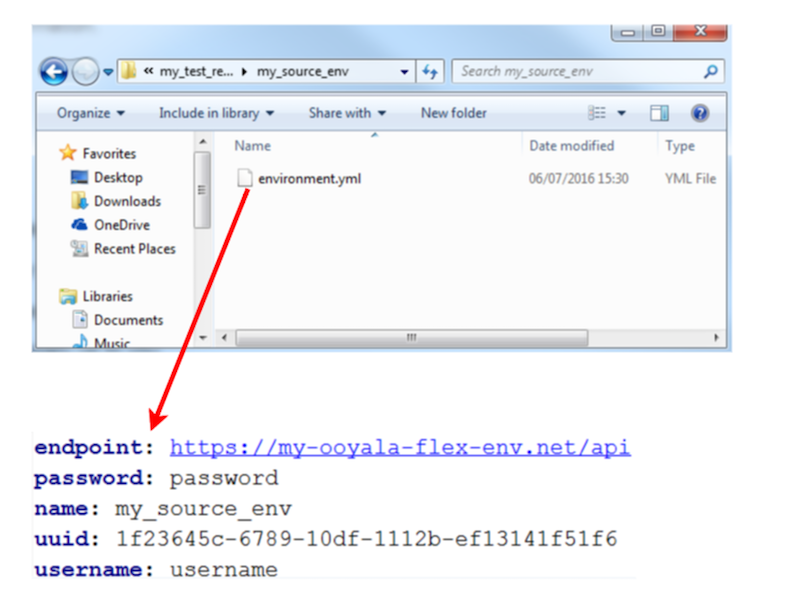
- Each environment folder will have a .yml file inside. This .yml file will contain the information for that specific environment. This information in each .yml file can be altered at any time, simply by opening it in a text editor.
The information in each .yml file must be accurate. For example, if the password for one of your environments you are using changes, you must open the .yml file associated with that environment, and update that piece of information.
In this example, we have only used two environments. You can have as many environments in your repository as you like. For example, you could have one source environment, and five target environments. The amount of environments you have in your repository is entirely up to you.
Next Steps
Once you have a source and target environment setup, proceed to the Getting Started section to create your first change request.