Message Templates
Message templates are used to specify and format messages that are to be sent to users when various events occur. They can support plain text and HTML formatting, and distribution to both email and SMS services. They are more commonly used within message-based notification based event handlers.
Message Template Object Properties
| Property | Support | Explanation |
|---|---|---|
| Scope | Account | The scoping of this object |
| Visibility |  |
Whether the object supports visibility |
| Plugins |  |
Supports plugins |
| Extended Config. | |
Whether the object has an extended configuration tab |
| Scripting | |
Whether the object can be configured using scripting |
| Enable / Disable | |
Whether the object can be enabled and disabled |
| Start / Stop | |
Whether the object can be started and stopped |
| Copy | |
Whether the object can be copied |
| Export / Import | |
Whether the object can be exported and imported |
| Delete | |
Whether the object can be deleted |
| Unique Name | |
Whether the object name must be unique within its scope |
| Variants | |
Whether the object supports variants |
Creating a New Message Template
- On the toolbar, click New, and select Message Template.

- In the Create new Message Template section, fill in the relevant details such as, name and visibility.
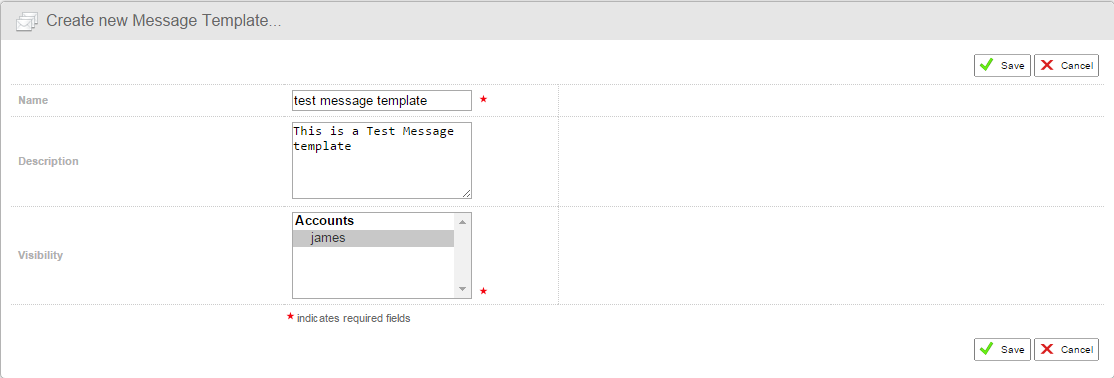
- Click Save to finalise.
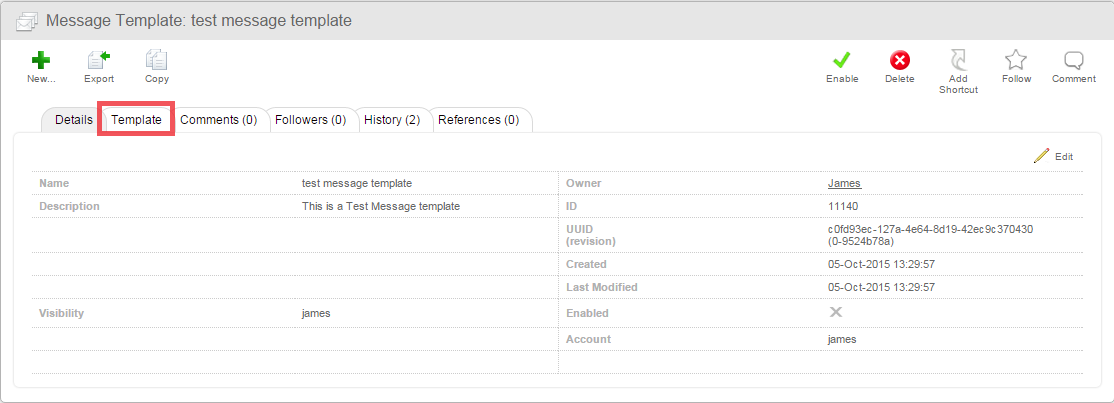
Configuring a Message Template
Once you have created your new message template you must set up a template. The template comprises the content and formatting for your message.
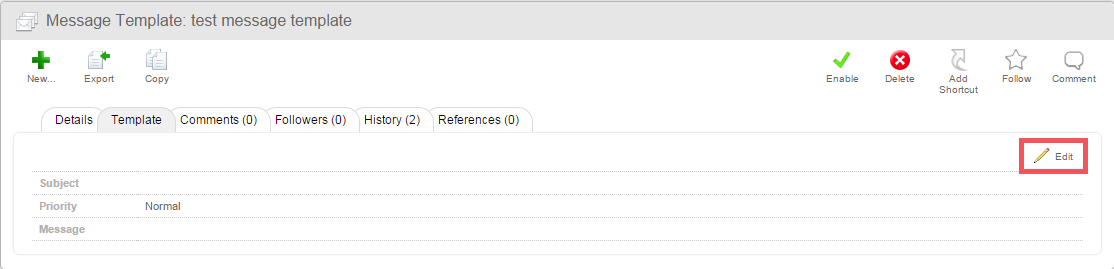
- Click the Template sub-tab.
- In the Create new Message Template section, fill in the relevant details such as, name and visibility.
- Click Edit.
- Edit the details for the message, such as subject, priority, and the message body.
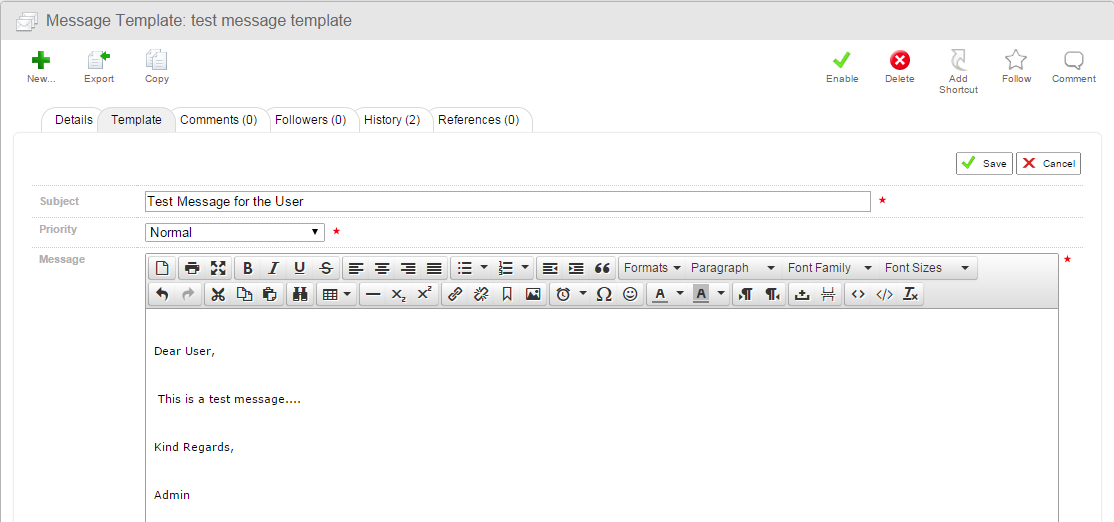
Adding Images
You can add images (e.g. company logos) to your message templates if you wish.
- Click the Insert/Edit Image icon.

- In the Insert/edit image pop up, specify the details for your image, and click OK.

Setting an Event Handler for the Message Template
In order to send your message template to a user, you must create an event handler.
- Create your Event Handler.
- Go to the Configuration sub-tab and click Edit.

- In the Message Template field, select the your message template from the drop down.

- In the Account field, you can select an account from the drop down. All users in that account will receive the message template you have created. You can select multiple accounts by clicking the Plus icon.

- In the Sub-Account field, you can select a sub-account from the drop down. All users in that sub-account will receive the message template you have created. You can select multiple sub-accounts by clicking the Plus icon.

- In the Group field, you can select a group from the drop down menu. All users in that group will receive the message template you have created. You can select multiple groups by clicking the Plus icon.

- In the Workspace field, you can select a specific workspace from the drop down. All users in that workspace will then receive the message template you have created. You can select multiple workspaces by clicking the Plus icon.

- In the User field, you can select a specific user from the drop down. That user will then receive the message template you have created. You can select multiple users by clicking the Plus icon.

- In the Expression field, you can enter an evaluated expression. You can enter multiple expressions by clicking the Plus icon.

- In the Subject field, enter a subject for your message.

- In the Sender field, you can enter an email address for the sender of the message.

- When you have finished configuring your event handler, click Save to finalise.
- Click Enable to enable your event handler.
- The scripting variables available depend on the context of where the message template is being used.
- If the message template is being used within an event handler, then the event object is available.
If you wish to embed the icon image for the Dalet Flex object you are referencing, you can use the following scripting:
```
<img src="https://#{event.mioObject.Account.hostname}.@[domainName]/${event.mioObject.iconURL}" alt="" />
```
In this context we are setting the domain name (@[domainName]) from Dalet Flex as a system property.
Scenario: On ingesting the asset or on modifying the metadata value of an asset, the user should be notified by an asset link.
In order to create the Dalet Flex asset link to the user in message body, add the following expression in the message body or the message template:
```
#{httpBaseUrl}/#mio=assets%2Casset%2Cindex.jsp%Fid%3D#{asset.id}
```